Thursday, February 21, 2013

Common Errors That Lead to Debt

There may be an endless list of errors that lead to debt, but two always seem to bob to the top. by Harvey Nowland Debt isn't the same as credit. If you have credit, it means that a mutual trust relationship exists between a lender and you, the borrower. The Bible doesn’t say that we cannot borrow, but God does warn against the undisciplined use of credit relationships, because they can quickly lead to uncontrolled debt. It seems amazing — considering all of the financial related commercials bombarding us — that most people aren’t trained to handle money. A common attitude is: If I want it, I'll get it, because I deserve it. And, if I don't have the money, I’ll charge it. It’s the attitude that says we should "get what we want, when we want it." The concept of saving to buy something seems alien. There may be an endless list of errors that lead to debt, but two always seem to bob to the top.
Buying too much house
Everyone enjoys a nice house, and a common practice is to buy based on how much monthly payment you can afford. However, a better test would be to determine just what you need, and not simply what you want, because things such as job loss and health issues can quickly impact that affordable monthly payment.
Buying too much auto
Larry Burkett used to say, "The best car to drive is probably the one you’re driving now." And unless it happens to be a gas-guzzling SUV — with today’s prices for a gallon of gas averaging $2.10 (as of March 2005*) and rising — you should probably plan to keep on driving it. If you must buy, a good quality used car from a trusted source will save you the thousands of dollars that you would lose when driving a new car off the lot. Here are some other common errors:
Vacation
Everyone needs rest and recreation. The big vacation error is paying for your playing with plastic. The key is to have an affordable vacation budget. Then, plan a getaway that fits your budget and not one that is based on what your credit cards will allow. Compare transportation and lodging prices on the Web. Even with today's gas prices, consider driving. Pack sandwiches, fruit, beverages and snacks, instead of eating in restaurants. Choose lodging with free breakfasts and swimming pools. Restaurants charge less for lunch than dinner, so treat yourself to good eating at noon.
Poor planning
– A budget is a written plan for managing your money, and without such a plan — unless you’re one of the fortunate few with an endless supply of money — you could be setting yourself up for unnecessary debt.
Credit and credit cards
– These don't cause financial problems, but abusing and misusing your credit and credit card does. This may sound strange, but don't automatically assume that you need more money if you're unable to pay your bills. More than likely, what you need is to regulate the way you’re managing your spending.
Don't borrow
– Borrowing doesn't relieve debt. Home equity loans and transferring credit card balances to lower rate cards generally won’t solve your debt or overspending problem. You must treat the debt problem with disciplined spending habits, take on no new debt and pay off your existing debt. It doesn't take much to get into debt, but the process of untangling yourself from debt's bondage can be daunting. When indebtedness shackles you to your creditors, you are not free to serve God fully.
Decide to get out of debt now — and stay out. With God's help, partnered with your discipline, you can. "A sensible person sees danger and takes cover, but the inexperienced keep going and are punished." (Proverbs 22:3 HCSB)

Monday, March 26, 2012

Jesus you are a great God

JEHOVAH-RAPHA IS THE HEALER OF ALL OUR SICKNESSES, Thank you Jesus.

Thursday, September 8, 2011

PIX 2

CISCO PIX: BASIC PIX CONFIGURATION

Basic PIX configuration

There are only 6 steps that need to be taken to enable the PIX to be able to send packets to the outside world, known by some as the PIX SIX, they are:

Hostname
Interface
Nat-Control
Nat
Global
Route

Hostname:

This assigns a host name to the PIX and should be called something that is meaningful for that particular PIX. The prompt will change to what you call the PIX when you set this and is set in the configuration mode with the command ‘hostname ’, like so:

Code:
pixfirewall>en
password:
pixfirewall#conf t
pixfirewall(config)# hostname Belaga
Belaga(config)#


Notice ‘pixfirewall’ now becomes ‘Belaga’. Usually the firewall may be named after its geographic location, the service/project it is protecting etc. I look at it in such a way that if you have 3 different telnet sessions open to three different PIX’s you will always know exactly what you are configuring.

The hostname can be up to 63 alphanumeric characters in either uppercase of lowercase and defaults to ‘pixfirewall’ out of the box or when the ‘wr erase’ command is used followed by a reload.

Interface:

The interface command differs per PIX operating system, in version 7 it acts much like a Cisco router and drops you in to the ‘config-if’ sub context. On version 6.3 and earlier the prompt will not change and the command should be issued all on the one line. For this paper we are using version 7

The Interface or ‘int’ for short is the configuration command we use to allow us to alter the configuration of the PIX interfaces. We can assign it an IP address, subnet mask etc from this sub context.

Code:
Belaga (config)# interface ethernet0 (or ‘int e0’ for short)
Belaga (config-if)#


Notice with version 7 the prompt now changes to ‘config-if’ to let us know we are configuring an InterFace.

We can now configure the interface with a name, IP address, speed settings and duplex settings amongst others.

Code:
Belaga (config-if)# nameif outside


Although it is already named outside by default the above example is to show the relevant command. ‘nameif’ as is fairly obvious, is used to assign a name to the interface.

Next we need to assign an IP address and subnet mask:

Code:
Belaga (config)# interface ethernet0 (or ‘int e0’ for short)
Belaga (config-if)# nameif outside
Belaga (config-if)# ip address 80.80.80.80 255.255.0.0


If you make a mistake whilst entering this command, simply re-enter the correct information. The ‘clear configure ip’ command will clear ALL interfaces IP addresses to no IP address.

Interfaces can also be configured to pick up a DCHP assigned IP address, by using the ‘dhcp’ command.

Code:
Belaga (config)# interface ethernet0 (or ‘int e0’ for short)
Belaga (config-if)# nameif outside
Belaga (config-if)# ip address dhcp


The PIX will now pick up a DCHP IP address on the OUTSIDE interface.

There are various DHCP commands we can use to view information about the DHCP IP address, such as the lease time etc

Code:
Belaga# sh ip address outside dhcp lease


And

Code:
Belaga# sh ip address outside dhcp server


The above will both provide you with information about the DHCP server and details about the IP address that the interface has been assigned.

To stop the interface from getting a DHCP IP address we use the ‘no’ command before the dhcp command. So:

Code:
Belaga (config-if)# no ip address dhcp


*Most of the commands you issue via the CLI can be disabled by re-entering them with the word ‘no’ in front of them.*

Next we need to assign a security level to the interfaces (the INSIDE and OUTSIDE interfaces have a precompiled security level, but for this example we will set them anyway).
A security level can be between 0 and 100, with 100 being the highest and most trusted. See part one if you want to read more about security levels.

To set it we use the ‘security-level’ command:


Code:
Belaga (config)# interface ethernet0 (or ‘int e0’ for short)
Belaga (config-if)# nameif outside
Belaga (config-if)# ip address 80.80.80.80 255.255.0.0
Belaga (config-if)# security-level 0


By default interfaces with the same security level can not communicate, to enable it use the ‘same-security-traffic’ command. This may be handy when you have a DMZ and you want it to be able to communicate with the INSIDE network without NAT being preformed.

Code:

Belaga (config-if)# same-security-traffic


Next we need to tell the interface what speed and duplex settings we want it to operate at. By default all interfaces are set to automatic detection and will try to detect the best speed and duplex settings to work at. However sometimes you may need to configure them manually.

The speeds for an Ethernet cable you can choose from are 10, 100, auto or nonegotiate.

10 = 10BASE-T
100 = 100BASE-T
Auto = automatically sets the speed
Nonegotiate = for small form factor pluggable media types (SFP) and sets the speed to 1000Mbps.

Code:
Belaga (config)# interface ethernet0 (or ‘int e0’ for short)
Belaga (config-if)# nameif outside
Belaga (config-if)# ip address 80.80.80.80 255.255.0.0
Belaga (config-if)# security-level 0
Belaga (config-if)# speed 100
Belaga (config-if)# duplex full

Network Address Translation (NAT)

As this paper is about configuring a PIX and not explaining how network protocols work I will very briefly explain about NAT.

Network Address Translation enables you to prevent external hosts from learning your internal IP addresses.
It accomplishes this by translating internal IP address, which is not routable over the internet, in to a globally unique IP address, which is routable over the internet. If you assigned your PC an IP address of 192.168.2.2 and tried to put it directly on the internet you would neither be able to receive or send traffic as the first router would drop your packets as soon as it saw your IP address.

This poses a problem for anyone with more than one computer behind a single connection, as if the above is true we would need an external IP address for every single computer on our network – which is obviously not possible as all the valid IP addresses would be used up very quickly.

Enter NAT.

Providing certain criteria are met the PIX will translate internal addresses to an external address as per your configuration. To anyone looking from the internet it will look like you have an external IP assigned to you and in most cases will never find out your internal address.

When an outbound IP packet that is sent from a device on the INSIDE network reaches your PIX which has NAT configured the source address is extracted and then compared with a table of existing translations. If the source address is not already in this table, it is now translated to an address taken from our external pool of addresses called a Global Pool. The table is now updated and the packet is forwarded on with our new external IP address in the source address part of the frames header.

This entry will stay in the translation table for three hours by default (this can be changed manually) if no activity is detected for this translation after the three hours it is removed and the external IP is free to be used for another host.

Configuring NAT

To configure NAT we first need to tell the PIX which hosts/networks on our INSIDE interface are allowed to be translated and them we tell it what we would like them to be translated to.

We can configure NAT on a global level with the command ‘nat-control’. If we enter the nat-control command we are telling the PIX that all addresses need to be translated before packets can be sent out of another interface.

The opposite is ‘no nat-control’ which means that all hosts can send packets and only where a specific NAT rule has been entered will a translation take place. No nat-control is the default.

There are two types of NAT policies on a PIX; Inside NAT Policy and Outside NAT Policy.

As their names suggest if Inside NAT Policy is enabled all INSIDE hosts need to have an inside NAT rule configured, likewise it Outside NAT is enabled all OUTSIDE addresses must have an outside rule configured

We configure NAT by telling the PIX, which interface the hosts/network is on that we want to translate:

Code:
Belaga (config)# nat (inside) 1 0.0.0.0 0.0.0.0


The above tells the PIX that we want to perform nat on the (inside) interface, the 1 is the ‘nat group’ we have assigned it, this will be come apparent later, the 0.0.0.0 0.0.0.0 tells the PIX that we want to perform NAT on everything that is attached to the INSIDE interface. We could substitute this with 192.168.2.2 255.255.255.255 which would say that the host with that exact IP address needs to be NAT’ed or we could use 192.168.1.0 255.255.255.0 which would say that everything between192.168.0.1 and 192.168.0.255 needs to be translated.

*The 0.0.0.0 0.0.0.0 can be abbreviated to 0 0 however this can look a bit confusing to anyone not comfortable configuring a PIX so you may want to use 0.0.0.0 0.0.0.0.*

So now we have told it what IP addresses that require translating we need to tell the PIX what we want them translated to.
To do this we use the ‘global’ command.

Code:
Belaga (config)# global (outside) 1 80.80.80.81 – 80.80.80.200 netmask 255.255.255.0


The above command tells the PIX that we are assigning global IP addresses on the (outside) from NAT group 1 and the range of address available are 80.80.80.81 – 80.80.80.200

Our configuration so far:

Code:
Belaga (config)# interface ethernet0 (or ‘int e0’ for short)
Belaga (config-if)# nameif outside
Belaga (config-if)# ip address 80.80.80.80 255.255.0.0
Belaga (config-if)# security-level 0
Belaga (config-if)# speed 100
Belaga (config-if)# duplex full
Belaga (config-if)# end
Belaga# conf t
Belaga (config)# nat (inside) 1 0.0.0.0 0.0.0.0
Belaga (config)# global (outside) 1 80.80.80.81 – 80.80.80.200 netmask 255.255.255.0


So now all hosts on the INSIDE interface will be translated to an address between 80.80.80.81 to 80.80.80.200 whenever the send traffic from the INSDIE interface to the OUTSIDE interface.

*If the NAT command is used there MUST be a GLOBAL command, otherwise NAT will not work*

We can use static NAT’s that NAT a specific IP address either on the INSIDE or OUTSIDE interface to another IP on a different interface but this will be covered later in the Advanced PIX Configuration papers.

Route

Just like a router we need to tell the PIX where to send traffic destined for unknown and known IP addresses. We do this by configuring Static and/or Default Routes.

A static route is basically saying ‘To send a packet to the specified network, send it to this router’

A default route tells the PIX where to send traffic destined for an IP address/network not in its routing table. We normally configure a default route to state where internet traffic should go. It is impossible to enter every IP address on the internet in to the PIX’s routing table but it is easy to enter out internal networks in to it. So we say that, if there is no entry in the routing table, then the traffic is destined for the internet so send it here. If when the packet gets to the gateway it is not destined for the internet and has an internal IP, it will be dropped for reasons mentioned earlier.

Code:
Belaga (config)# route outside 0.0.0.0. 0.0.0.0 192.168.2.1 1


The above is an example of a default route. It is saying to route traffic out the outside interface if the IP address is not in the routing table 0.0.0.0. 0.0.0.0 to the router with the IP address of 192.168.2.1 which is 1 hop away.

Code:
Belaga (config)# route inside 10.10.10.0 255.255.255.0 10.10.10.1 1


The above is an example of a static route. This is telling the PIX that any traffic arriving on the inside interface destined for the 10.10.10.0 network should be sent to the router with the IP address of 10.10.10.1 which is 1 hop away.

Code:
Belaga (config)# interface ethernet0 (or ‘int e0’ for short)
Belaga (config-if)# nameif outside
Belaga (config-if)# ip address 80.80.80.80 255.255.0.0
Belaga (config-if)# security-level 0
Belaga (config-if)# speed 100
Belaga (config-if)# duplex full
Belaga (config-if)# end
Belaga# conf t
Belaga (config)# nat (inside) 1 0.0.0.0 0.0.0.0
Belaga (config)# global (outside) 1 80.80.80.81 – 80.80.80.200 netmask 255.255.255.0
Belaga (config)# route outside 0.0.0.0. 0.0.0.0 192.168.2.1 1
Belaga (config)# route inside 10.10.10.0 255.255.255.0 10.10.10.1 1
Belaga (config)# end
Belaga#wr mem


There we have our finished initial BASIC configuration. We have named an interface, assigned it an IP address and subnet mask, told it what speed to operate at, told it that we want to NAT all hosts on the INSIDE interface to the external IP addresses of 80.80.80.81-200, we have gave it a default route to tell it where to send unknown traffic and we have told it where to send traffic destined for the internal network of 10.10.10.0.

Obviously the IP addresses are just for demonstration purposes and all interfaces will need to be configured as above for the PIX to work.

PIX 1

CISCO PIX: INTRODUCTION, HOW IT OPERATES AND THE CLI

The PIX Firewall.

The Cisco PIX firewall is one of the most popular brands of firewalls available today. Whilst they can be a very useful piece of equipment, it is not always straight forward to configure them.
Due to the nature of a Firewall and what it is used for it is essential to deploy and configure it correctly to prevent you inadvertently leaving your network wide open to attack when you thought it was secure.

The PIX comes in several form factors:

501 – This the cheapest and smallest firewall in the PIX range and is aimed almost exclusively at Small Office – Home Office (SOHO) setups. It can support up to 7500 concurrent connections and has 60 Mbps throughput.
Interface wise it has a 10/100BASE-T Ethernet interface for the outside connection (100BASE-T is only in version 6.3) and a four-port 10/100 switch for the inside interfaces. It can also support up to 10 simultaneous VPN connections. It does not support any failover at all.

As you can no doubt see it is only useful for the very small SOHO setup.

506E – Although more useful for the SOHO setup than the 501, the 506E is more geared up towards the ROBO setup (Remote Office – Branch Office) and is an ideal choice for a small – medium sized business if you don’t need any failover capabilities, a lot of VLAN’s or a very fast throughput of data.
It can provide 25,000 concurrent connections and 100 Mbps clear text throughput.
It has only two 10/100BASE-T interfaces and support for up to Two VLAN’s and can support up to 25 simultaneous VPN connections. It does not support version 7 of the PIX operating system or the ADSM utility, instead it has a less useful PDM for remote configuration.

515E – Is designed for small to medium sized businesses and enterprise networks. It can handle up to 130,000 concurrent connections and provides 190 Mbps of clear text throughput. It can have up to 6 10/100 Fast Ethernet interfaces, 25 VLAN’s and up to five contexts (contexts will be explained later).
It is the first PIX in the range that supports failover and version 7 of the PIX operating system. It can have up to 2,000 VPN tunnels and supports site to site and remote access VPN’s

525 – The 525 is probably the most common security appliance in the PIX range that you may come across due to its affodability Vs funcionality. It can support up to 280,000 concurrent connections, has 330 Mbps of clear text throughput, up to 10 10/100 Fast Ethernet interfaces, up to 100 VLAN’s and 50 contexts.
It supports failover and version 7 of the PIX operating System and up to 2,000 VPN tunnels.

535 -The Cisco PIX 535 is a high-performance, purpose-built security appliance designed for very large enterprise and service provider networks.

It supports up to ten 10/100 Fast Ethernet interfaces or nine Gigabit Ethernet interfaces and redundant power supplies, can handle up to 1.7 Gbps of firewall throughput with the capacity to handle more than 500,000 simultaneous sessions.

Certain PIX 535 models include an integrated hardware VPN acceleration card that delivers up to 440 Mbps of Triple Data Encryption Standard (3DES) VPN throughput and 440 Mbps of Advanced Encryption Standard-256 (AES) VPN throughput.


The PIX firewall range has a wide variety of add on cards and can work hand in hand with the Adaptive Security Appliance (ASA). There are too many add on cards and different ASA configurations to go in to here but the Cisco web site has all the information if you need to research it further.

Getting Started:

There are three ways to connect to the PIX:

1) Via the console cable
2) Via the PDM or for the 515 and later the ADSM
3) Via Telnet /SSH (needs to be configured first)

If you are comfortable with the Command Line Interface (CLI) on the PIX then the best way to connect is via the console port. To do this, simply attach the supplied console cable and open hyper terminal (or a terminal emulation program of your choice) set the baud rate to 9600 and press enter.

If you are not comfortable using the CLI then Cisco have provided a GUI for you to use. On the 501 and the 506E this is known as the PDM and on the 515 and above it is known as the ADSM.

Connect to the INSDIE interface of the PIX (Eth1) using a normal Cat5 Ethernet cable, open your web browser and type 192.168.1.1.If you get stuck trying to connect to the PIX to use the PDM/ADSM refer to the user manual and it will tell you the IP address range the DHCP server uses. This is usually 192.168.1.1/24 so either set your PC to receive an IP via DHCP or configure it in the correct subnet 192.168.1.2 is usually good with a 255.255.255.0 mask.

There is a known problem when using the PDM with Sun’s latest versions of Java. You need to have version 4 installed, which you can get from the archive pages on the Sun web site. If you can not connect you may need to remove the latest Java update from the Add/ Remove programs window in the control panel.( 5.0 update 5 and 5.0 update 6)

For now we will use the CLI.

Once connected there are four administrative modes you can be in:

1) Unprivileged
2) Privileged
3) Configuration
4) Monitor

When you first connect via the CLI you will be in unprivileged mode, which uses the > prompt:

Code:
Firewall>


Just like a router you would now type ‘enable’ or en for short

Code:
Firewall>en


If there is a password set you will now be prompted for a password, the PIX usually ships with the default password of either pix or cisco.

If you enter the password successfully you will now land in privileged mode, which uses the # symbol:

Code:
Firewall#


From the privileged mode you can issue most commands that will show you details about the configuration but will not allow you to alter the configuration except for setting passwords, writing configuration to memory and a few others:

Code:
Firewall#show running-config (or sh run for short)


The above command would show you the entire running configuration of the PIX.
To make and changes to the actual configuration of the PIX we need to be in configuration mode. We get this by using the command Configure Terminal (or conf t for short)

Code:
Firewall#conf t


The prompt will now change to:

Code:
Firewall#


This shows us we are in configuration mode. From here we can now change the configuration of the firewall.

Monitor mode is a special mode that enables us to update the OS image over a network to perform password recovery. Whilst in Monitor mode we can enter commands to specify the location of a TFTP server, the location of the updates software or a password recovery file to download.

As mentioned with most Cisco equipment that uses a CLI commands can be abbreviated to the fewest unique characters for that command.
So sh run is short for Show Running-Configuration, en is short for Enable, copy run start is short for copy running-configuration > startup-configuration.

The first thing we can do is set a password for the PIX to stop unauthorised access. It is easy to get so engrossed in the configuration of the PIX to forget to set a user password once finished, so I make it a habit to set the password on any device first.

There are 15 different access levels we can grant a user when he logs on to the PIX, with 15 being the highest. Depending on what password is used will depend on what access level the user is dropped in to.

To set the password we need to be in the privileged mode (the # prompt).

So

Code:
Firewall>en
Password:
Firewall#


We now issue the command enable password

Code:
Firewall#enable password tazzone123 15


Enable = we want to set the enable password (the password that is presented when the enable command is issued)
Password = we are setting the password and not giving the enable command.
Tazzone123 = the password we want to set
15 = the privilege level that anyone using that password will be granted. In this case the user will have total control of the PIX.


Before we go in to the configuration commands there are a few commands we need to know to save the configuration to memory and to erase it in case we mess it up!

Like a router the PIX has two different configurations; running configuration and start-up configuration.

The running configuration is what we are making all the changes to. If after making the changes we do not save it to the start-up configuration and the PIX was to be unplugged, suffer a power cut etc it would start up with the configuration that is in the start-up configuration and all our changes would be lost.

There is a twofold advantage to this – we can make changes ‘on the fly’ and if the firewall was to stop working as it should, we can just reload it and it will have its old configuration, the other benefit of it is if we are unsure of any changes that have been made we can use the sh start and the sh run commands to view both configuration’s and compare then to each other.

After we have made a change to the running configuration and are sure we want to keep it, the command ‘write memory’ is used to save the running configuration to the start-up configuration.

Code:
Firewall#write memory (or wr mem for short)


If we have made a complete hash of the running configuration and want to start over again but still retain the start-up configuration we can use the command ‘clear configure all’.

Code:
Firewall#clear configure all (or clear con all for short)


Finally if we want to clear everything and start from afresh we can use the command ‘write erase’

Code:
Firewall#write erase (or wr er for short)


You will be prompted to confirm that you do want to erase the start-up configuration, hitting Enter or typing Yes will clear the configuration.

We will still be active in the running configuration however so we need to either reload the PIX or copy the running configuration to the start-up configuration.

To reboot the PIX we use the command ‘reload’

Code:
Firewall#reload


We will be prompted to confirm we want to reload the device.

Or we can use the copy run start command to copy the running configuration to the start-up configuration:

Code:
Firewall#copy run start


If you are writing a script to send or paste straight in to the PIX we can issue the ‘reload noconfirm’ command – which will just reload the device without asking for confirmation.

*Before making any changes to the PIX once you have an up and running configuration you can copy the results of the ‘show run’ command in to a text editor such as notepad. Then if you ever need to revert back to the configuration you can just copy and paste it straight back in to the firewall.*

Security Levels

The whole concept of the PIX security appliance revolves around security levels. The more trusted the network the higher the security level.

Obviously the most un-trusted network is going to always be the internet – and the interface that is going to be attached to the internet is the OUTSIDE interface (Eth0) which has by default the security level of 0.

The most trusted network attached to the PIX is going to be your internal network, which funnily enough is attached to the INSIDE (Eth1) interface and has a security level of 100 by default.

*You can remember which interface is which by the Ethernet numbers, Eth0 = Outside interface, Eth1 = Inside network…. 0-Out 1-In)*

The interfaces came with the INSIDE and OUTSIDE names pre-complied and can not be changed, likewise the security levels can not be changed either.

Code:
Outside level 0 -<--<---<--|PIX|--<---<---<-Inside level 100


An interface that has a higher security level can by default send traffic to an interface with a lower security level – hence internal hosts attached to the inside network with a security level of 100 can by default pass traffic through the outside interface as it only has a security level of 0. Traffic can flow downhill but not uphill.

This allows for one way (outbound) connections with a minimum number of configuration changes. The PIX will monitor the outgoing packets and when the return packet comes in, it is checked to ensure it is a valid packet and if so, is sent on its way.


The outside interface as it has a 0 security level can not send traffic to the inside interface with out a preconfigured permission to do so in the form of an Access Control List (ACL)

If you were to add a third interface for a DMZ and give it a security level of 50, the INSDIE interface would be able to pass traffic to it by default, but with out an ACL the DMZ would not be able to initiate a connection to send data to the INSIDE interface and obviously the least trusted interface (OUTSIDE) would not be able to initiate any connection to any interface with out an ACL being in place.

It is possible to enable same security level traffic flow, so two interfaces with the same security level can pas traffic unhindered should you wish..


The PIX Adaptive Security Algorithm is a stateful approach to security, in so much as every inbound packet (the packet originating from a host on a less secure network destined for a host on a more secure network, i.e. DMZ (50) ->->-> INSIDE (100) ) is checked against a database called the State Table which is stored in the PIX’s memory which keeps the state of every connection that has passed through the PIX. This will tell the PIX if the packet is a return packet from a connection initiated from the INSIDE network, or if it has arrived out of the blue.

This table keeps a record of the original packets:-

1) Source IP Address
2) Source Port
3) Destination IP Address
4) Destination Port
5) Additional TCP / UDP Flags / Protocol etc
6) Original TCP Sequence number
7) Replacement TCP Sequence number
(The PIX randomizes the first TCP sequence number to reduce the risk of TCP Hijacking and does this by default.)

If a returning packet does not match ALL of the above criteria it is dropped there and then. Each of these entries is called a 'Session Object' and will stay in memory until the connection is terminated in the normal way or the session has timed out.

So in a nutshell if a packet arrives on the OUTSIDE interface, the PIX will check that either a Static NAT/PAT Translation exists for it and if so will then check if it is permitted by an ACL, if there is an ACL the PIX will act in accordance with it.
If no static translation exists the PIX will check the state table to see if it is a return packet from a connection that has been initiated by an inside and therefore trusted host - if it meets all the requirements in the state table the packet is allowed to continue its journey. If not the packet is dropped straight away.

The stateful design to the PIX maintains the secure perimeters of the different networks by creating session flows based upon the destination and source address and also the destination and source port numbers of the packets. Fundamentally, this is how the whole PIX is designed to work and will be discussed in more detail in further papers.

*Inbound and outbound traffic is not necessarily traffic coming from the internet to the inside network and vice versa. Traffic is considered to be inbound if it is coming from an interface with a lower security level and is considered to be outbound if it is coming from a higher security level. The most interfaces the PIX can support is 14 depending on Model and License*

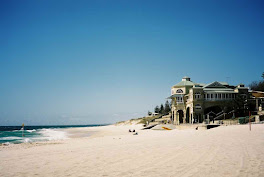
beach

beach
cottesloe beach restaurant

City of Perth

City of Perth
view from King's park

Houston TX

Houston TX

San antonio

San antonio
Powered By Blogger